Connection to UA Server
To provide UA client functions, you should create the OPCUACLIENT node (see The 'Add Protocol' Command ):
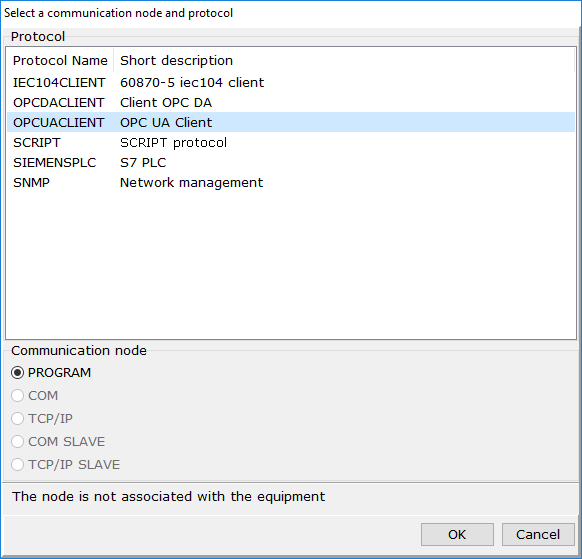
In that node, you should create the opcuaclient device (see The 'Add Device' Command ).
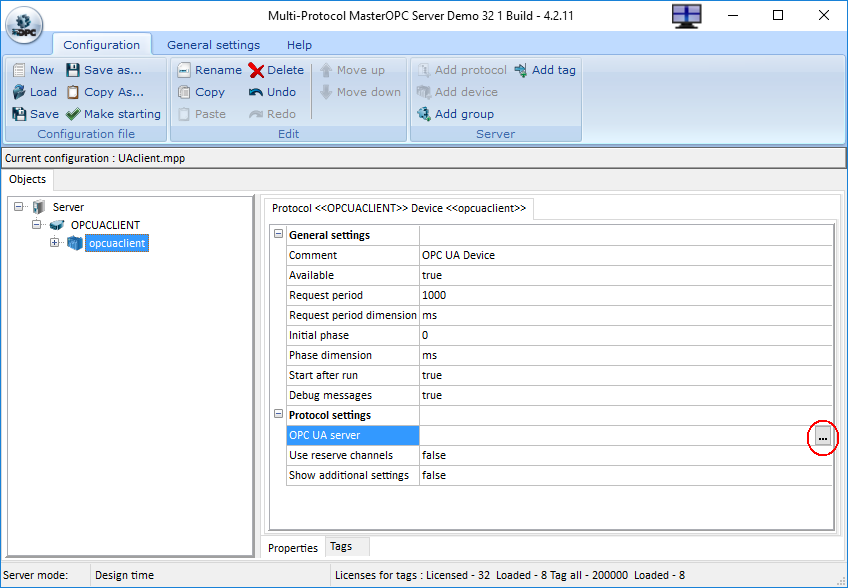
The Protocol settings section of parameters of the opcuaclient device contains the OPC UA server parameter. In order to select an OPC UA server, you should click the button ![]() in the line of that parameter:
in the line of that parameter:
Upon that command, the Select endpoint dialog opens:
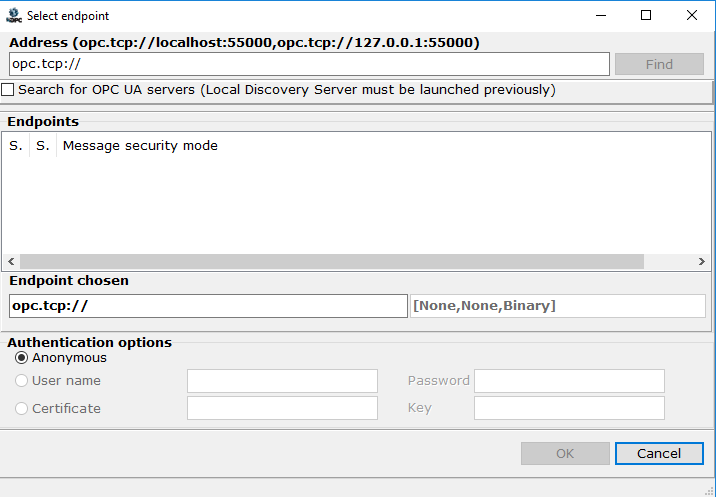
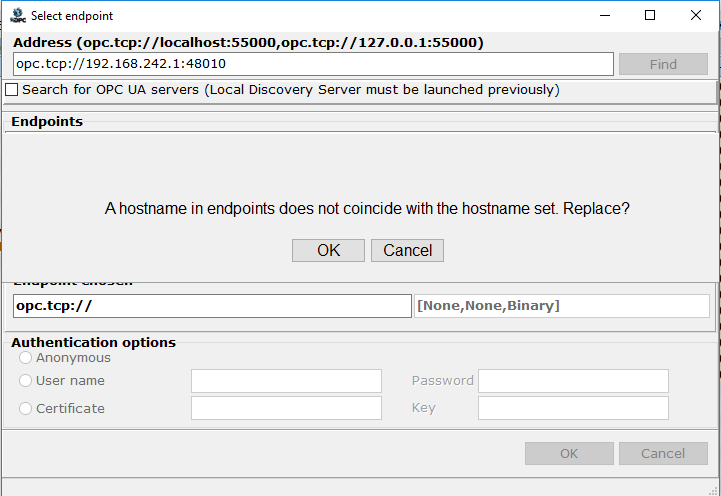
An endpoint of an OPC UA server is set in the Address field:
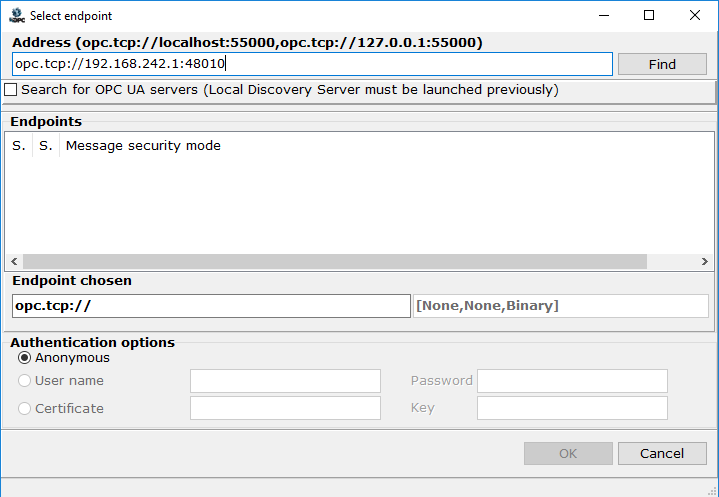
Next, click the Find button. This starts a search of OPC UA server endpoints available. If a name of a computer of an OPC UA server found is not coincide with the name specified (a server returns a computer name, or an UA server is across beyond a router), a proposal to change an endpoint is displayed:
If you click "Cancel", a computer name returned by an UA server is passed to the list of endpoints.
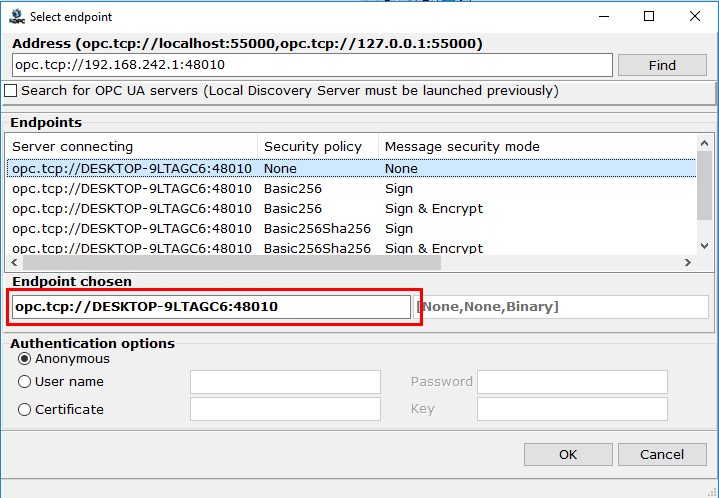
If you click "OK", a computer name returned by an UA server is replaced by a name, which is set by a user in the search field. This variant is applied if an OPC UA server is not visible directly (for instance, an UA server is across beyond a router).
The list of endpoints contains all of variants to connect to the OPC UA server. Being selected in the list, an endpoint is displayed in the field Endpoint chosen.
Upon the OK command, an attempt to connect to the server is executed. If the server is detected, the dialog to confirm the connection is displayed:
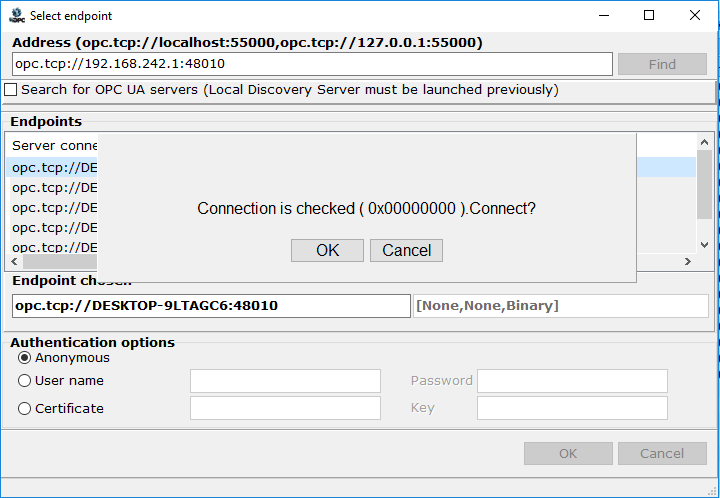
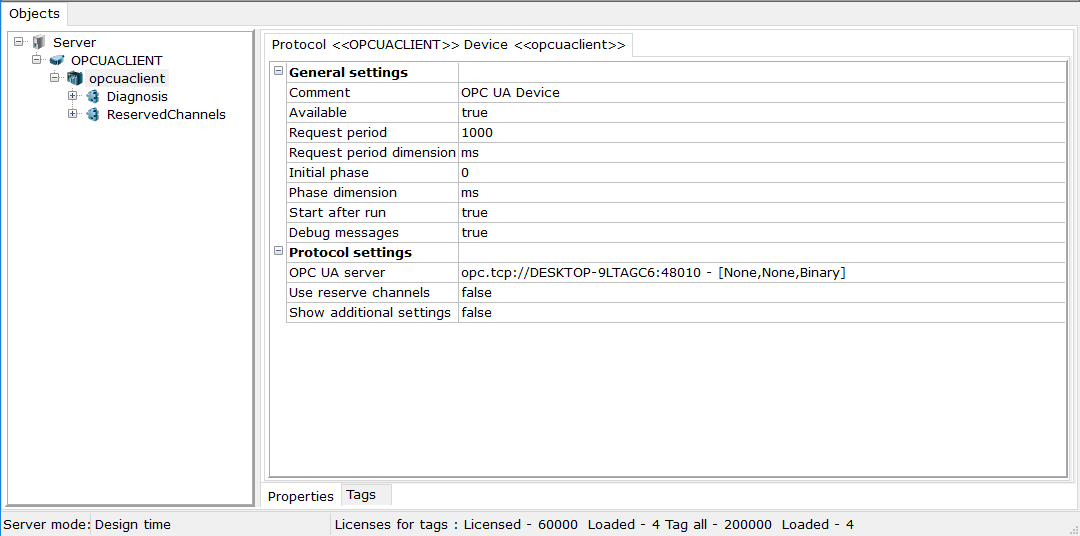
To cancel, click Cancel. To proceed, click OK – the endpoint selected is displayed as a value of the OPC UA server parameter:
Next, Creation of Tags for Exchange with UA Server must be made in the device.