The following is the recommended sequence for configuring device polling via the SNMP driver.
Important: Due to the fact that the SNMP driver import utility works with the network, it is strongly recommended to disable the firewall/antivirus on your computer, or add the utility to the list of trusted and allow it to work via UDP.
The list of variables available in the device via SNMP is stored in special MIB files. There is a basic part of OID addresses - available in all devices and also separate MIB files for devices provided by their manufacturers - these files contain OID addresses specific to the device. Before you start, you should find the MIB file for your device - usually the manufacturer posts it on their website.
Once the MIB file is found, determine if there is a connection to the device by PING to it. We then recommend that you check for connectivity using any MIB browser, such as the iReasoning Mib Browser. Launch this browser, open a MIB file in it, and enter the IP address of the device. To the right of the IP address entry is the Advanced button, where you can specify the port (if different) and the SNMP version. Then find the appropriate tag in the MIB table and double-click on it to add it to the polling table.

If everything is successful, you can move on to configuring the OPC server.
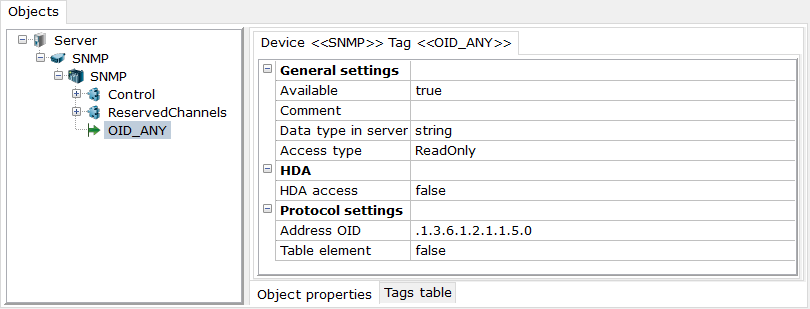
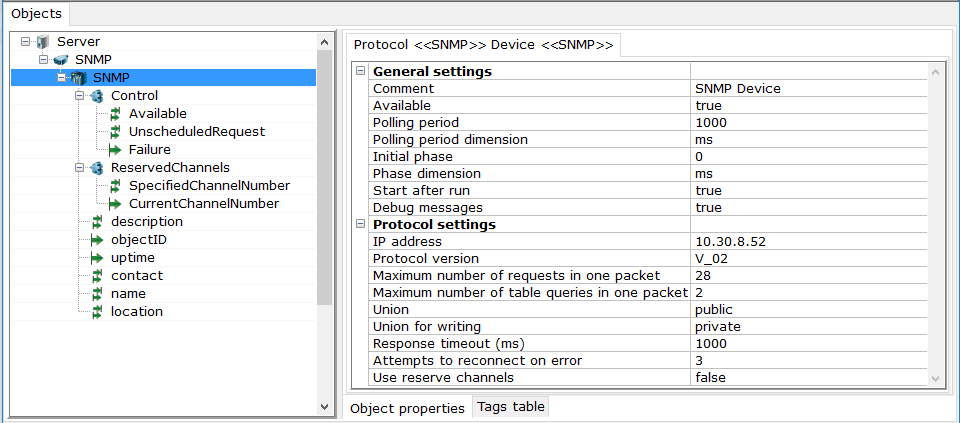
Create a new configuration, add the SNMP protocol and the device to it. In the device settings, set the connection parameters to the device - IP address and protocol version. In rare cases, it is necessary to adjust the fields Union and Union to write. In case of using SNMP v3, you also need to additionally set the Security Name (username), Security Level, Authentication Algorithm and Password settings.
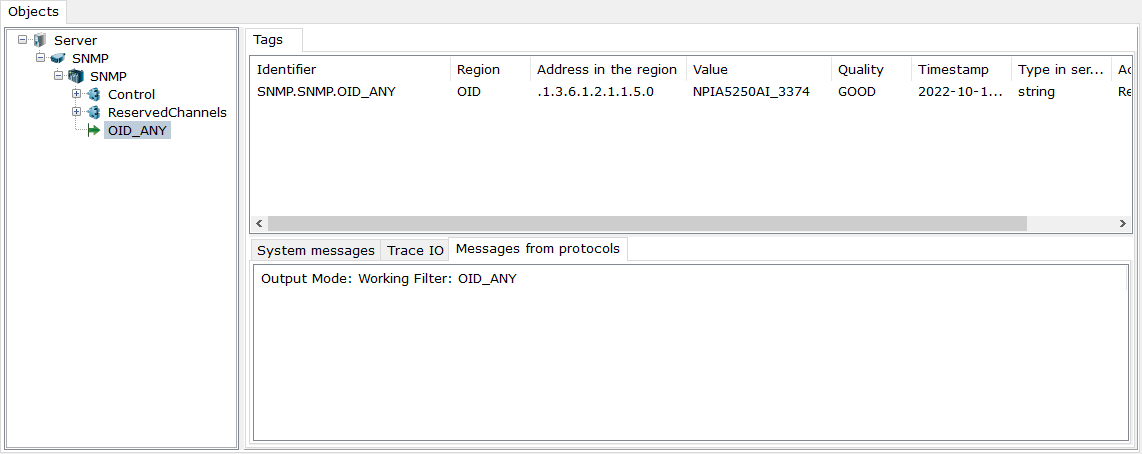
Then, we recommend adding 1 tag that you have previously polled in the iReasoning Mib Browser, and run it in runtime to ensure that the driver polls successfully.
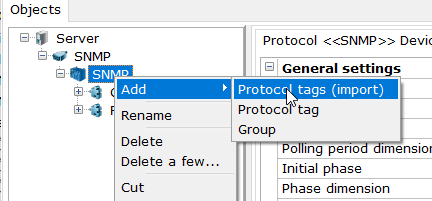
If the survey was successful, you can move on to importing tags. To do this, call the context menu of the device - Add - Protocol tags (import).
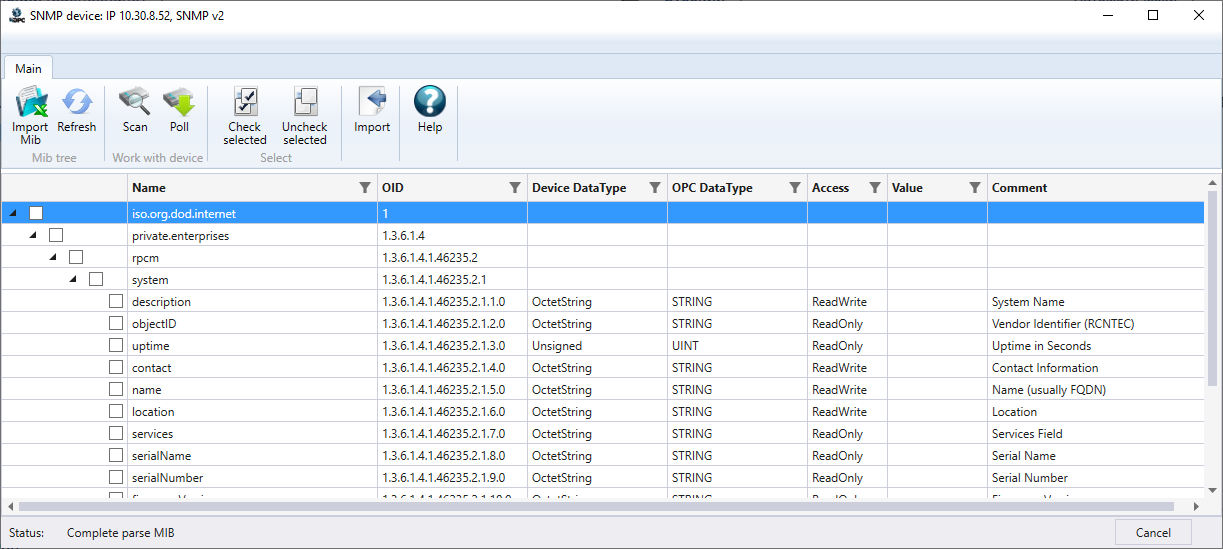
From the import utility menu, click Import Mib. In the standard dialog box, select the MIB files of your device.
Note. When selecting files, mib and txt extensions are supported.
Parsing of files and formation of tag tree will start. Processing status is displayed in the status bar at the bottom of the window.
If errors occur during processing, a message will be displayed:
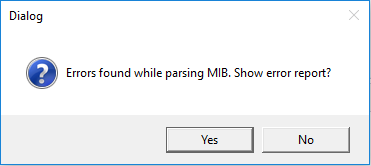
Click Yes - the report will be opened in Notepad (or other software assigned for txt files by default).

Note. The report files are saved to the c:\ProgramData\InSAT\Multi-Protocol MasterOPC Server\SERVERLOGS\ folder.
This file contains files that could not be imported, their dependencies, and which dependencies are missing. In this case, the tree of tags can be built, but it will contain only variables of those files that were successfully processed.
If your files are in the list of not added files, you should find their dependencies. Then open this file together with other MIB files or place it in the folder of standard MIB files:
c:\ProgramData\InSAT\Multi-Protocol MasterOPC Server\SERVERIMPORT\SNMP\mibs\standard\
After that, repeat the procedure. The error may reappear - now another dependency may not be detected, with which you need to perform the same actions.
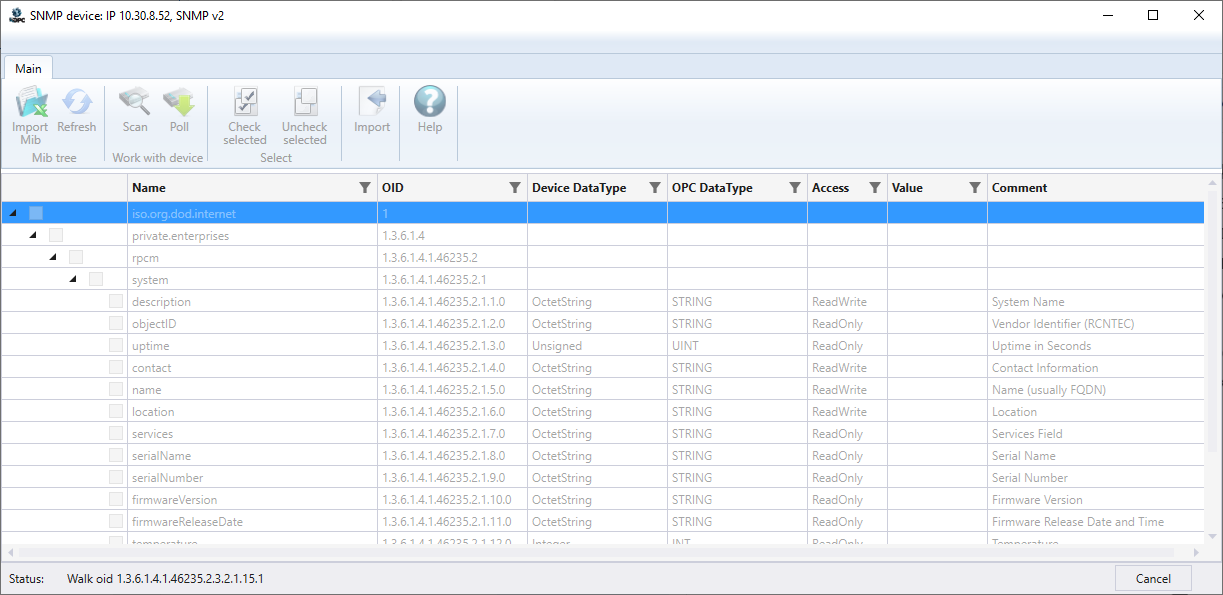
Once the tree has been formed without errors or the variables you need have been added, you can move on to scanning the device. To do this, click the Scan button in the utility menu:
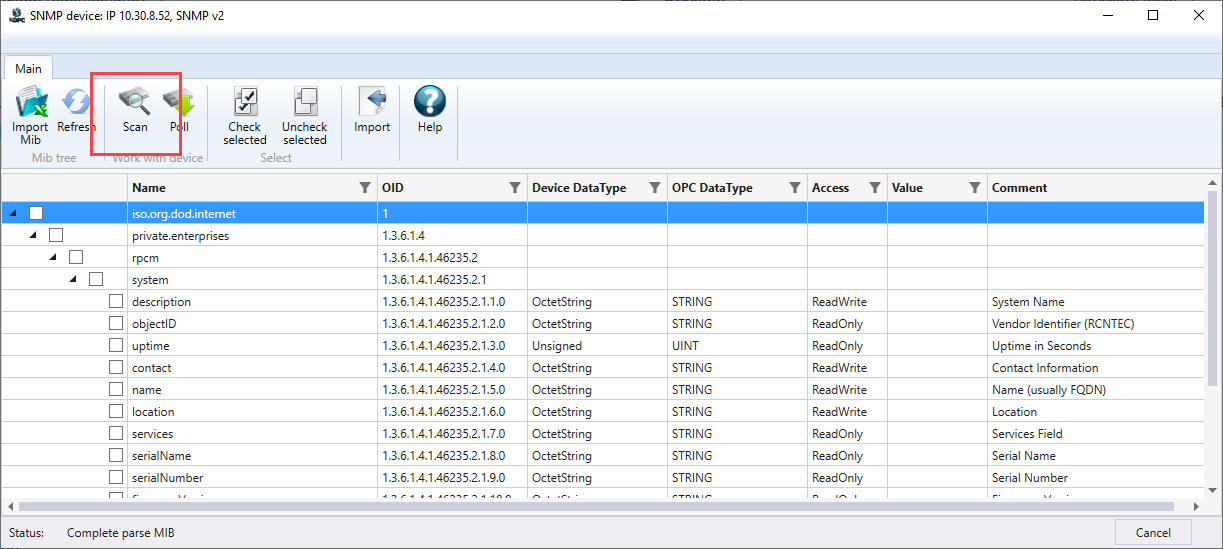
When this button is clicked, a Walk operation is initiated on all device variables - a sequential polling of all available OIDs. Once complete, it also attempts to sequentially poll the tags, gradually increasing the number of OIDs in the packet - this determines the maximum OID value in the packet, which will then be transferred to the OPC server configuration. The status of the scan operation is also displayed in the status bar at the bottom of the screen.
Note. During scanning, all menu buttons are blocked. You can abort the operation by clicking the Cancel button in the status bar at the bottom of the window.
After the scanning operation is complete, a message may appear:
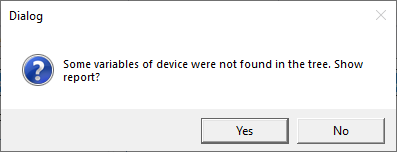
This means that some of the variables found in the device are not found in the generated MIB file tree. Click Yes if you want to see these variables:
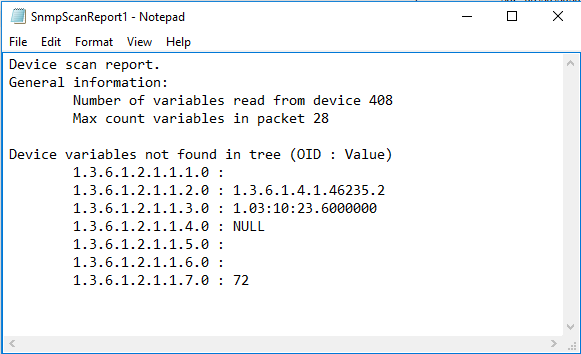
In the report you can see how many variables there are in the device, how many variables can be queried with one GET request, as well as variables not found - their OID and current value.
Then a window will appear:

Usually, there are more variables in the MIB file tree than there are actual values in the device, and there may be variables with data types not supported for polling by the OPC server. If you click Yes in this window, all these variables will be hidden from the tree and only available variables will remain in the tree - it is recommended to choose this option.
The tree will be updated and the variables will show their current values:
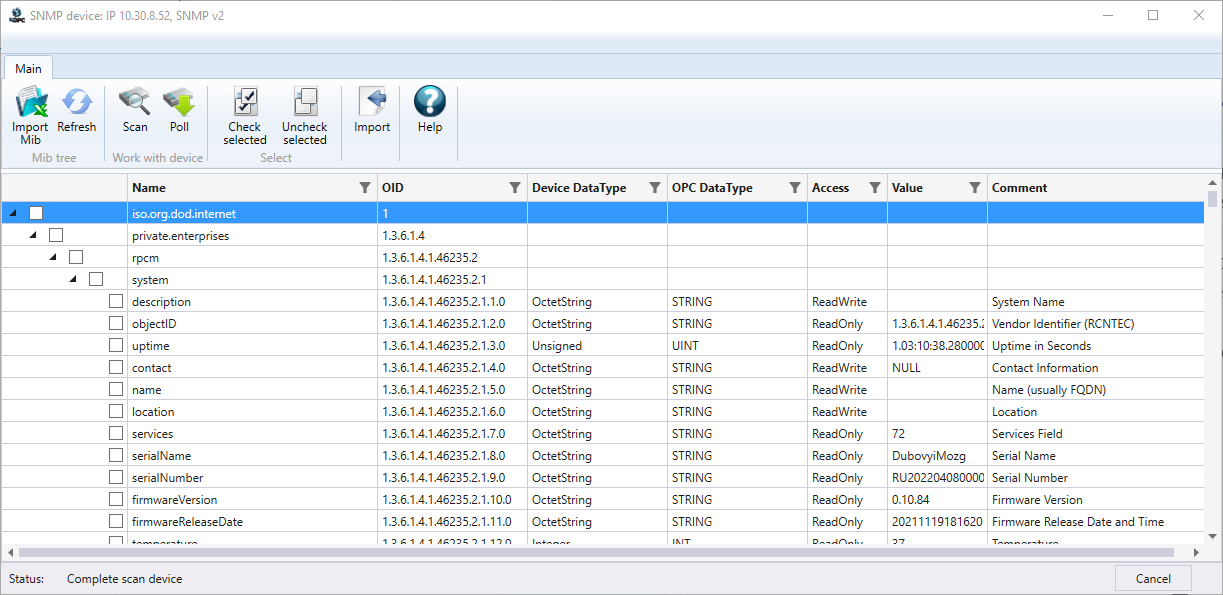
Set the checkboxes of the variables you need. If necessary - you can filter the tree leaving only the necessary variables.
It is allowed to select variables in groups using the standard Shift and Ctrl combinations. Selected variables can be checked using the Check selected menu item or the context menu items.
Also through the context menu select selected, reset selected, select all or reset, and hide selected or unselected from the tree:
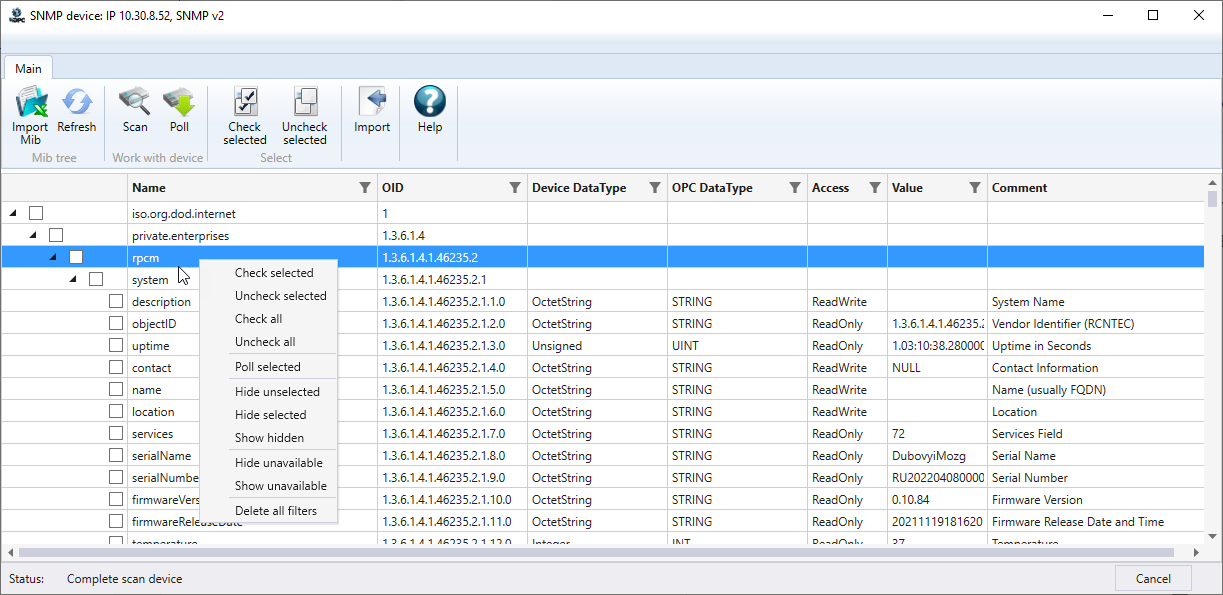
If necessary, you can poll variables using the GET method. You can poll the selected ones in the tree - through the context menu item Poll Selected, or all the checked ones using the Poll button in the import utility menu.
After all necessary variables are selected, you should finish the import process by clicking the Import button in the menu. The import utility will close and all selected tags will be added to the OPC server.
Simple SNMP variables are added to the device root. Variables that are part of a table are added to the group with the table name.
If it is necessary to write to the device, start the server in runtime mode and in the GUI of the server write to the tag. To do this, find the desired tag in the tag table and double-click on the value and then enter the value. If the writing failed and the old value is displayed when reading the tag, then most likely the problem is in the incorrect value of the Union for writing. Try using "public" instead of "private". If the write fails even in this case, try writing from iReasoning MIB Browser and also check the merge information with the device manufacturer.